PowerBIPS + Service Principal

Last February Microsoft announced that its possible to authenticate with service principal.

This allows you to perform operations on the REST API without an actual user account (master account) or a Power BI PRO license assignment.

Learn here on how to create the Service Principal and configure it to use in your Power BI Tenant. In resume the steps are:

  1. Register an App in Azure AD
  2. Create a Security Group and add the App as a Member
  3. Enable Service Principals to use the Power BI APIs and add the Security Group above
  4. Add the App to the workspace as Admin

Regarding  PowerBIPS to use a Service Principal you should get the token using the following code:

$tenantId = "MyTenant.onmicrosoft.com"
$clientId = "Application Id"
$clientSecret = "Application Secret"

$authToken = Get-PBIAuthToken -clientId $clientId -clientSecret $clientSecret -tenantId $tenantId

With the token you can call any of the cmdlets like this:

$reports = Get-PBIReport -authToken $authToken -groupId "Workspace id"

Note: Service Principals are only supported over new Power BI Workspace model and doesn’t work with admin APIs

Automatically Export PBIX’s using #PowerBIPS

Ever wanted to export all your Power BI reports from a workspace and save a copy without manually going to each one and select the “Download report” option:

image

My team at DevScope just updated the PowerBIPS powershell module with a simple cmdlet to do just that:

Export-PBIReport –destinationFolder “<local folder>”

With an easy PowerShell script you can download all the reports from your PowerBI workspaces (ex: Backups?):


Install-Module PowerBIPS

# Get the Auth Token

$authToken = Get-PBIAuthToken 

# Define the Workspace you want to download the reports from - Optional, by default downloads from personal workspace

Set-PBIGroup -authToken $authToken -name "Demos - PBIFromTrenches" -Verbose

# Downloads the reports to a destination folder

Export-PBIReport -authToken $authToken -destinationFolder "C:\Temp\PBIReports" -Verbose

Azure Analysis Services Tracer (aka AzureASTrace.exe)

Recently we had the need to analyse the queries made by the users on Azure Analysis Services and to cross reference that data with Azure AS metrics. For example to see exactly which queries are the cause for high QPU’s or Memory and see who made them on which application.

Currently Azure AS allows you to configure an Extended Events session to collect events from your Analysis Services database:

image

But there’s no easy way to export or save that data to do some further analysis. You can only watch live data and it’s not very user friendly:

image

We tried to use the good old ASTrace but it’s not compatible with Azure Analysis Services and it’s not a very good practice because it basicaly create a Profiler Session that will be deprecated soon.

Because we desperately needed to analyse the user queries to identify bottlenecks my amazing BI team at DevScope build an great tool called “Azure-As-Trace” that will allow you to point to a Analysis Services Instance and instantly start collecting the events you want and store them in the file system in JSONL format.

You can download it or contribute to it at github: https://github.com/DevScope/Azure-AS-Tracer

It’s very simple to use you just need to download the binaries and change in the config file ‘AzureASTrace.exe.config’ the following parameters:

ConnectionStrings/AnalysisServices The connection string to the Analysis Services instance you want to monitor
AppSettings/XEventTemplateFilePath The path to the XEvents trace template to create the monitoring session on the Analysis Services Instance
AppSettings/OutputFolder The path to the Output Folder that will hold the JSONL files

image

After that you have two options:

  • Run AzureASTracer as a console application, by simply executing AzureASTrace.exe

image

  • Run AzureASTracer as a windows service by running ‘setup.install.bat’ and start the service

image

Either way when running the events will be saved on this on the Output folder, AzureASTrace will create a file for every Event Type subscribed and group the files by day:

image

To analyze those events you can this Power BI Desktop template:

Automatically pause/resume and scale up/down Azure Analysis Services using AzureRM.AnalysisServices

One of the big advantages of Azure Analysis Services is the ability to pause/resume and scale up/down as needed, this will allow you to pay only for what you use and greatly reduce costs.

Azure Analysis Services team released a PowerShell module “AzureRM.AnalysisServices” with cmdlets to manage your Azure Analysis Services resources and they could be more easy to use:

  • Get-AzureRmAnalysisServicesServer – To get your server metadata and current status
  • Suspend-AzureRmAnalysisServicesServer – To suspend a server
  • Resume-AzureRmAnalysisServicesServer – To Resume a server
  • Set-AzureRmAnalysisServicesServer – To update a server, ex: change the SKU

More details here.

But this is only effective if we somehow automate this operation, it’s not feasible if someone on the team or customer is actively pausing/resuming or scaling up/down the instance

With that in mind we build a very simple PowerShell script where you configure in which time and days the Azure AS should be on and on which SKU.

Download the full script here.

The script is configured by a JSON metadata:

image

The above metadata will configure Azure AS to:

Days

Hours

SKU

Mon-Fri

8 AM to 18 PM (peak hours)

S1

Mon-Fri

18 PM to 00 AM (off peak)

S0

Sat-Sun

8 AM to 00 AM

S0

Other

Other

Pause

The powershell script has the following parameters:

-resourceGroupName

The name of the Azure Resource Group your Azure AS server is deployed:

clip_image002[5]

-serverName

The name of the Azure AS Server:

clip_image004

-configStr

The JSON metadata config string

-azureProfilePath

(optional)

The path to an Azure profile stored locally using the “Save-AzureRmContext” cmdlet.

This is useful to test the script locally.

-azureRunAsConnectionName

(optional)

The name of Azure Connection if you want to run this script in a Azure Automation RunBook:

clip_image006

Probably most of you will want to run this script on an PowerShell Runbook in Azure Automation, learn how to setup the Azure Automation here.

Next you will need to register the module “AzureRM.AnalysServices” as an Asset of your automation account:

clip_image002[7]

After that just create a new PowerShell runbook:

clip_image004[4]

Paste the script and remember to set the parameter -azureRunAsConnectionName:

clip_image006[4]

Publish the script and create a schedule:

clip_image008

clip_image010

That’s it! You know have your Azure AS automatically pausing/resuming and scalling up/down using a configuration file you defined.

Now just lay back and measure the savings at the end of the month!

Automate Azure Analysis Services Pause/Resume using PowerShell

Recently we came across the need to use one of the newest Azure services – Azure Analysis Services (AS). This lead us to an awesome Software as a Service (SaaS), dazzling query speed, stunning scalability…and a new administration paradigm, administer SaaS in the cloud.

Since Azure Analysis Services is charged hourly and we know that we will not use the service 24/7, how could we automate the pause/resume feature of the Azure Analysis Service so that we could optimize savings?

Couldn’t be more straightforward, except for some lack of documentation/examples, thanks Josh Caplan for pointing us in the right direction: Azure Analysis Services REST API

First, and so that the REST calls to the ARM API can be authenticated, we need to create an app account in the Azure AD. This can be done manually, as a standalone act or, better yet, as part of an Azure Automation Account with a Run as Account creation. The last will deploy a new service principal in Azure Active Directory (AD) for us, a certificate, as well as assigns the contributor role-based access control so that ARM can use it in further runbooks.

Recap, we will need:

An Azure Automation Account so that we can have:

· Runbook(s) – for the exercise, specifically a powershell runbook;

· A run as account so that the script can authenticate against Azure AD;

· Schedules to run the runbook.

This is how you can achieve it:

clip_image002

(If you already have automation account and don’t have a run as account, create an Application Account in Azure AD.)

Having created the azure automation account, we can peek at the new run as account with the service principal already created for us:

clip_image004

Additionally, we can take the opportunity to gather the application, tenant and subscription id’s, it will serve us latter.

Having the Automation Account in Place is time to create a key for it, go to your app account in Azure AD, in the all settings menu select keys and create a new key with the desired duration. Copy the key value and save it somewhere safe, you won’t be able to get it later!

clip_image006

For now, all we have to do is to collect:

· ApplicationID: in Azure AD –> App Registratons –> The name of app we just created

· Application Key: Collected from the previous steps

· TennantID: Azure Active Directory –> Properties –> Directory ID value

· SubscriptionID: From the Azure URL: https://portal.azure.com/#resource/subscriptions/e583134e-xxxx-xxxx-xxxx-bb8c398a8116/&#8230;

· Resource group name: From the Azure URL: https://portal.azure.com/…/resourceGroups/xxxResourceGroup/&#8230;

· SSAS server name: Analysis Services -> YourServerName

Having those, replace this values in the below script and save it somewhere for now – we encourage you to develop and test your powershell scripts in powershell IDE –, and yes, this script will also work in an on-premises machine.


#region parameters
    param(
            [Parameter(Mandatory = $true)]
            [ValidateSet('suspend','resume')]
            [System.String]$action = 'suspend',

            [Parameter(Mandatory = $true)]
            [System.String]$resourceGroupName = 'YouResourceGroup',

            [Parameter(Mandatory = $true)]
            [System.String]$serverName = 'YourAsServerName'
    )
#endregion


#region variables 
    $ClientID       = 'YourApplicationId'
    $ClientSecret   = 'YourApplicationKey'
    $tennantid      = 'YourTennantId' 
    $SubscriptionId = 'YourSubsciptionId'
#endregion
 

#region Get Access Token
    $TokenEndpoint = {https://login.windows.net/{0}/oauth2/token} -f $tennantid 
    $ARMResource = "https://management.core.windows.net/"

    $Body = @{
            'resource'= $ARMResource
            'client_id' = $ClientID
            'grant_type' = 'client_credentials'
            'client_secret' = $ClientSecret
    }

    $params = @{
        ContentType = 'application/x-www-form-urlencoded'
        Headers = @{'accept'='application/json'}
        Body = $Body
        Method = 'Post'
        URI = $TokenEndpoint
    }

    $token = Invoke-RestMethod @params
#endregion


#region Suspend/Resume AS -> depending on the action parameter
    
    #URI TO RESUME
    #POST /subscriptions/{subscriptionId}/resourceGroups/{resourceGroupName}/providers/Microsoft.AnalysisServices/servers/{serverName}/resume?api-version=2016-05-16

    #URI TO SUSPEND
    #POST /subscriptions/{subscriptionId}/resourceGroups/{resourceGroupName}/providers/Microsoft.AnalysisServices/servers/{serverName}/suspend?api-version=2016-05-16

    $requestUri = "https://management.azure.com/subscriptions/$SubscriptionId/resourceGroups/$resourceGroupName/providers/Microsoft.AnalysisServices/servers/$serverName/$action ?api-version=2016-05-16"

    $params = @{
        ContentType = 'application/x-www-form-urlencoded'
        Headers = @{
        'authorization'="Bearer $($Token.access_token)"
        }
        Method = 'Post'
        URI = $requestUri
    }

    Invoke-RestMethod @params

#endregion

With the powershell script assembled – note that one of script parameters is the action (suspend/resume), that we want the script to execute against the SSAS – the next steps are:

· Create a runbook within the early created automation account with the type powershell, paste the previous script, save it and…voilà, ready to test, publish and automate!

clip_image008

· Next step is to publish the runbook so that it can be used in a schedule, fully automating the suspend/resume procedure. After publishing the runbook, create/assign it schedules – one to suspend and other to resume the AS server:

clip_image010

Afterwards configure the desired script parameters for each schedule:

clip_image012

The final result should look like this and give us the desired suspend/resume Azure AS automation.

clip_image014

Hope that you’ve learned from our post, have a nice Azure automation, leave your comments below!

Filipe Sousa

Use Power BI Desktop as an ETL Tool

Did you ever faced a scenario were you needed to load a collection of CSV/Text files into SQL Server tables?

What solution did you choose?

  • TSQL BULK INSERT?
  • SSIS Package (generated from SSMS Tasks->Import Data or manual)
  • PowerShell “Import-CSV”

And what if the SQL Server destination tables must be typed (numeric, date, text columns,…) and the CSV file has formatting issues (ex: text columns without quotes, datetimes not in ISO format) and you need to transform the columns into the desired types?

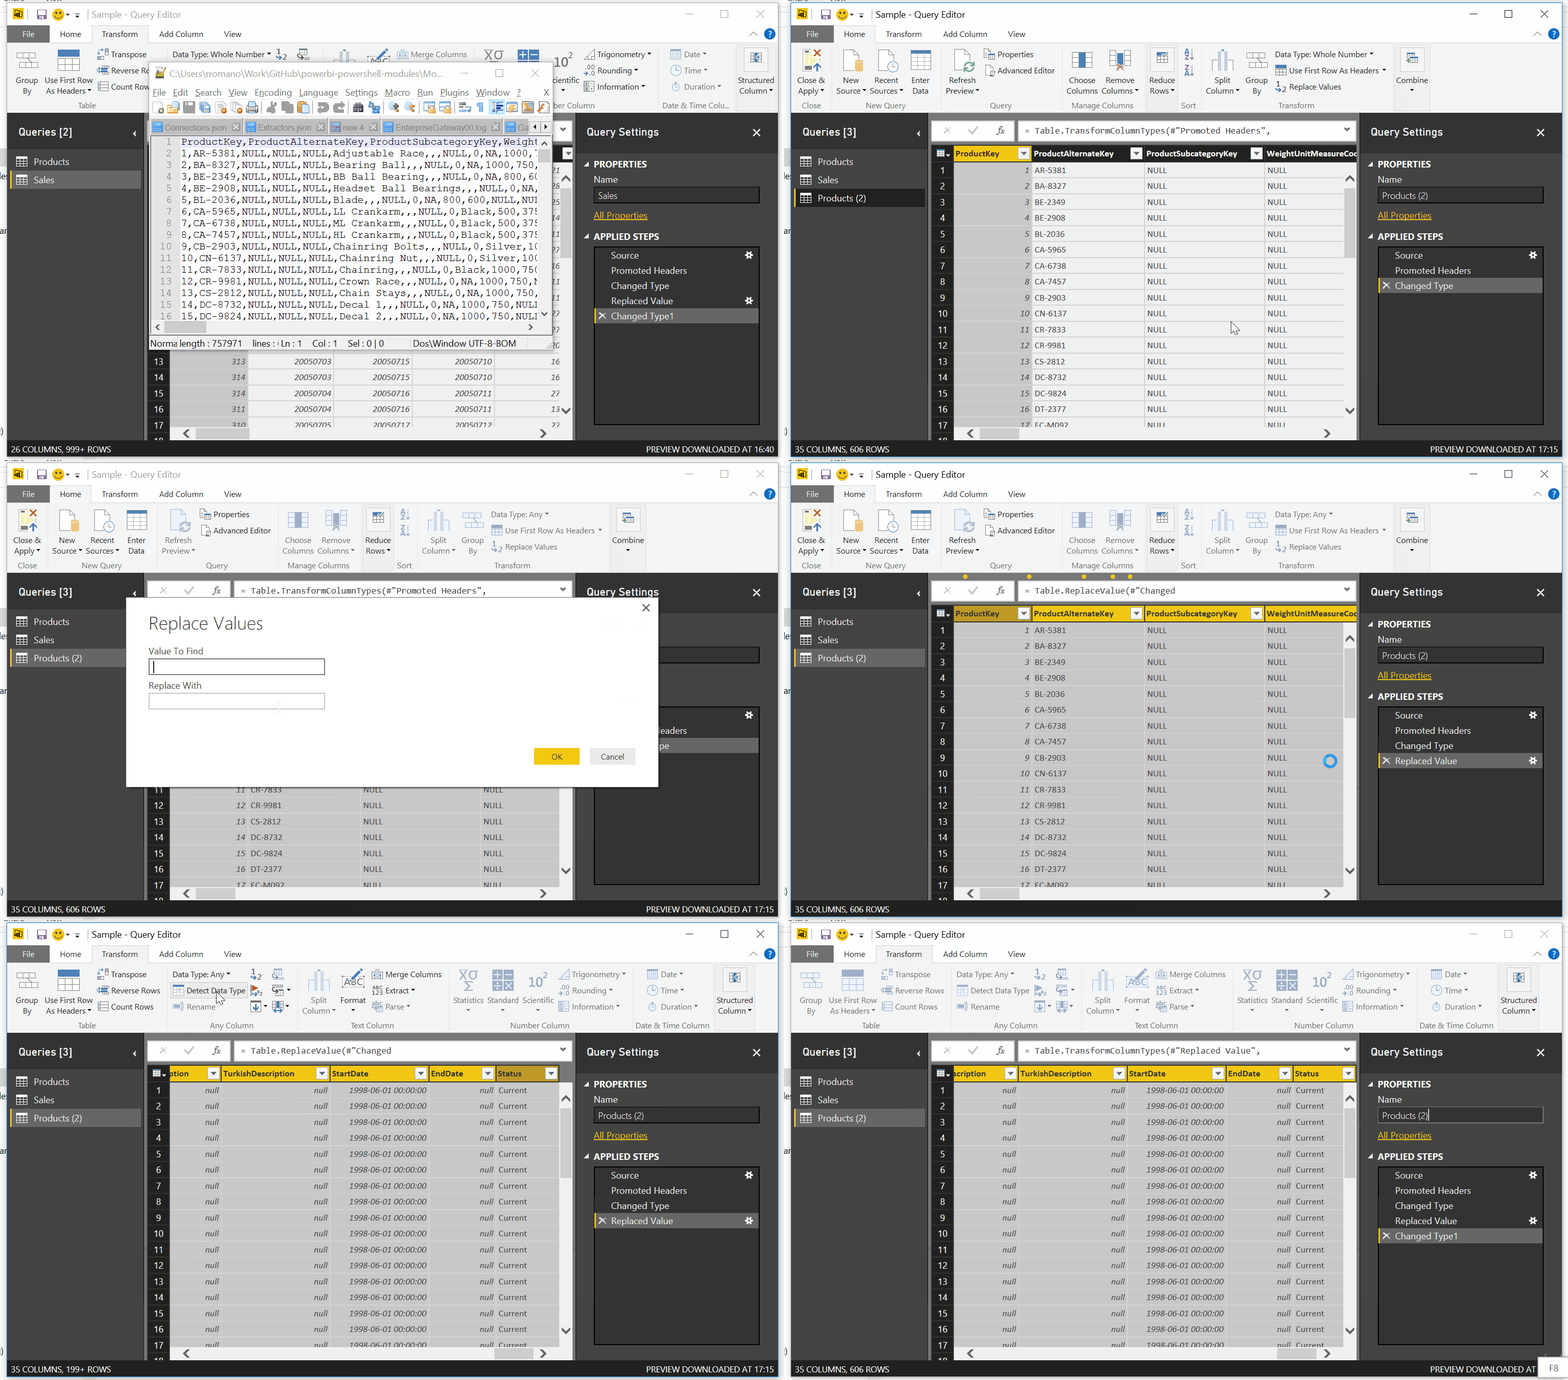
A much quicker solution to transform CSV files into the desired shape is using a PowerBI Desktop query (or PowerQuery), for example in seconds I can:

  • Load the CSV
  • Replace a value from all the columns (in this case “NULL” from a real null)
  • Auto detect the datatypes

PBIDesktopQuery

Now to load these queries into a SQL Server database, it’s very easy thanks to DevScope powershell module “PowerBIETL” (also available at PowerShellGallery):


Install-Module PowerBIETL
Import-Module PowerBIETL

Export-PBIDesktopToSQL -pbiDesktopWindowName "*sample*" -sqlConnStr "Data Source=.\SQL2014; Initial Catalog=DestinationDB; Integrated Security=SSPI" -sqlSchema "stg" -verbose

The cmdlet “Export-PBIDesktopToSQL” will take care of:

  1. Connects to the PBI Desktop and read the tables
  2. Automatically create the tables on the SQL Database (if they do not exist)
    • Thanks to DevScope “SQLHelper” powershell module and “Invoke-SQLBulkCopy” cmdlet
  3. Bulk copy the data from PBI Desktop into the SQL Table

The cmdlet has 4 parameters:

  • -PBIDesktopWindowName (mandatory)
    • A wildcard to find the PowerBI Desktop window
  • -Tables (optional, defaults to all the tables)
    • Array of tables to import
  • -SQLConnStr (mandatory)
    • Connection to a SQL Server database
  • -SQLSchema (optional, defaults to “dbo”)
    • The schema under the tables will be created

As a result all the tables from the PBI Desktop file will get copied into the SQL Server database:

image

Off course this will only work to those “one-time-only” or manual scenarios, but I assure you that is much quicker than using a SQL Integration Services package Winking smile

Rui Romano

Power BI Desktop Trace Logs Analyser

In this post I will show you how to analyse Power BI Desktop diagnostic trace files in a more visual way than notepad Smile

First you need to collect some diagnostics by enabling tracing on Power BI Desktop, go to: File –> Options –> Diagnostics –> Enable Tracingimage

If you click on “Open Traces folder”:

image

It will open the trace folder with all the trace logs:

image

PS – Trace log are only generated after you test your power bi report, do some refresh and interactions first to create the trace logs

Now to analyse these logs you could off course open them in notepad:

image

But is not very easy to read, so what better way to process and visualize this huge amount of text data??? Power BI off course!!!

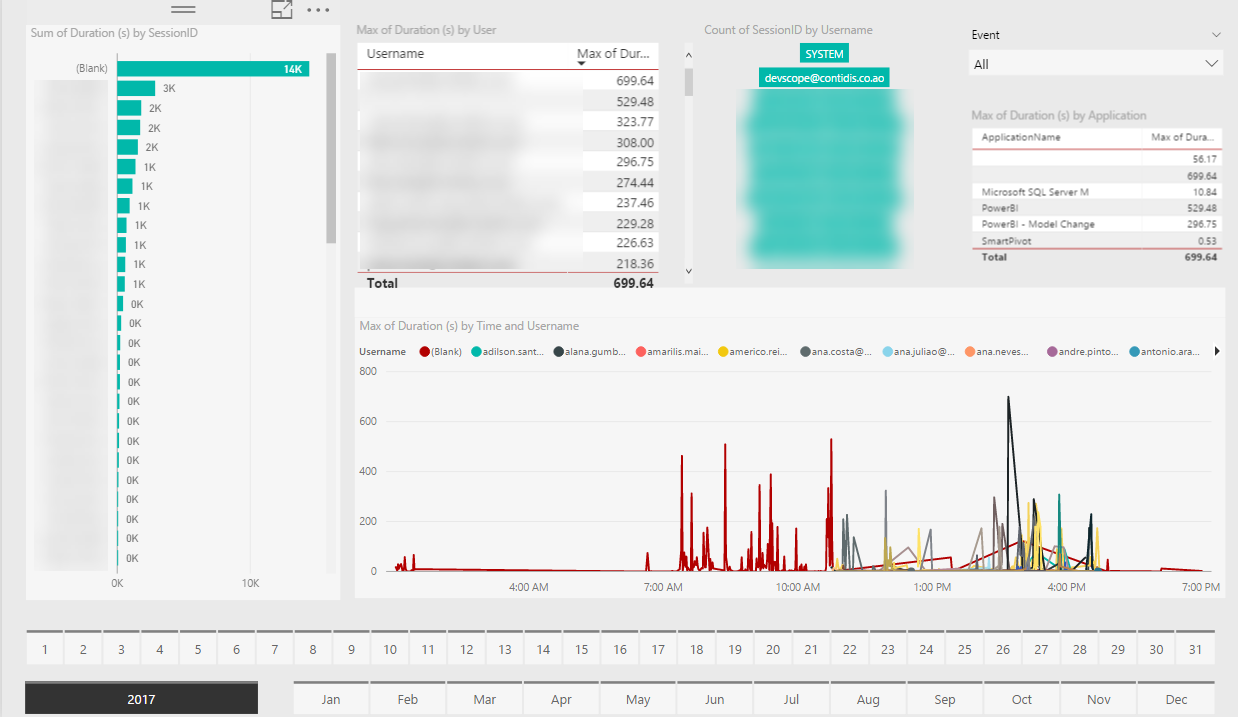
So I created a Power BI Desktop to process and visualize the trace logs, that will allow you to quickly visualize things like:

  • Errors
  • Duration of queries
  • Performance issues
  • etc

image

image

Instructions of usage:

  • Download and open the Power BI Desktop file
  • “Edit Queries” and change the variable “VAR_LogFolder” to point to the trace logs folder:

image

image

  • Refresh the Report

image

Rui Romano